I had to get the window trim done for the front window and installed, because the upper bunk actually butts right up to it ( Put the window a little higher than it should have been). Got that done and the 3 boards I used for the upper bunk hinged together with 72" piano hinges. If I haven't mentioned it earlier I shellaced all four boards used for the bunk, (both sides), with 3 coats of Amber shellac and two coats of clear. I also rounded over both edges of the board I used as the front of the bed to hold cushions in place and installed it. I wanted it more as a shelf rather than a bed, but it will pull out to 39" when necessary. When folded it is about 16" wide. Looks really nice.
Bunk bed - looking up from outside from front window opening
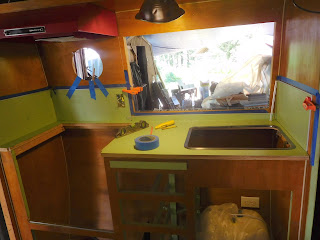
Once I taped off the area I wanted the back splash to attach to, I sanded with 150 grit sandpaper to roughen it up a bit so the laminate would have something to stick to. Afterwards I got the templates made and the laminate cut out, so my husband could make the 45 degree angle cuts on the corners of the 1/16" edge trim. I then glued the trim to the edges of the laminate pieces & let them dry. Once it was firmly attached to the laminate I used Gorilla Glue construction adhesive and attached the trimmed laminate to the walls.
I had the counter top cut out and laminate already glued on & ready to install once the backsplash was put on.
Here's the counter with the Red Range placed in its spot.
Plus I put in my faucet and soap dispenser...
Here is the swivel table top done and installed on its leg. I think it is going to come in really handy as I can raise it and lower it too.
Sunday and Monday this week I spent putting some more curbing over the edges in the front and street side back edge. All I need to do now is from the top of the windows and over the top on both sides, Then I can finish insulating, put house wrap on, and order the new metal skin.


